The Complete Guide to Print-Then-Cut Files
Print-then-cut is how printed stickers, decals and labels get their shape. You print the artwork on your own printer, then a cutting machine reads the sheet and cuts precisely around each design. This guide covers the whole process end to end - what a cut file actually contains, how registration marks and offset work, how to turn raster art into a cut line, which file format to export, and how the main machines differ. Wherever a topic deserves its own deep dive, you will find a link to a focused guide.
What print-then-cut is and the end-to-end workflow
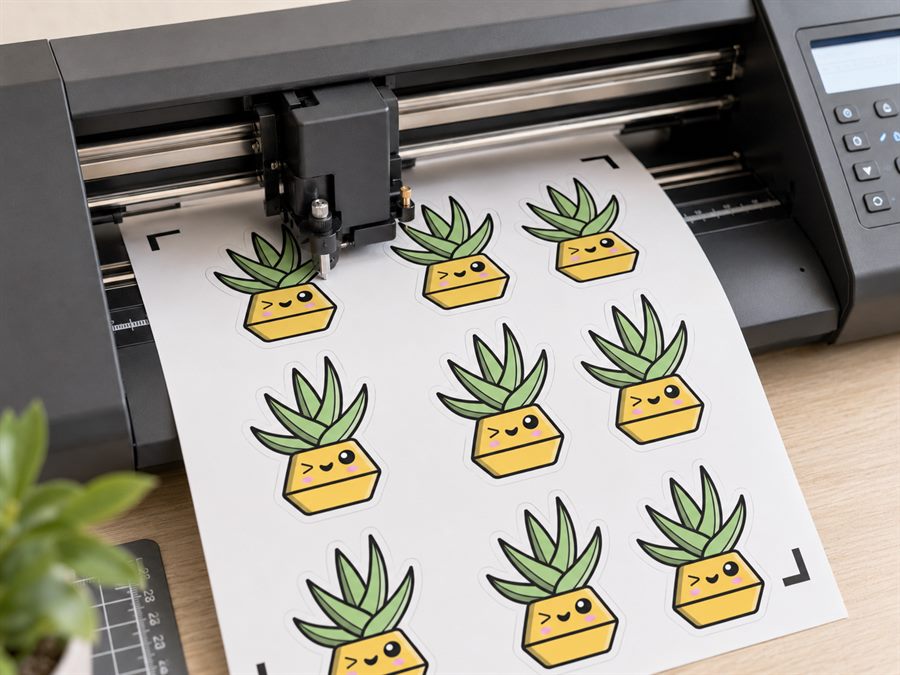
Print-then-cut (sometimes written "print and cut" or "PNC") is a two-stage process. First you print a finished design onto sticker paper, vinyl or card using an ordinary inkjet or laser printer. Then you feed that printed sheet into a cutting machine, which cuts along a line you defined around the artwork. Because printing and cutting happen on two different devices, the machine needs a way to find exactly where your print landed on the sheet - and that is where registration marks come in.
The typical workflow looks like this:
- Design. Create or import your artwork at the size you want it to print.
- Add a cut line and registration marks. Draw a vector outline around the art and place the printed targets the machine will scan. This is the step most people get wrong, and the one CutPath Pro automates.
- Print. Send the page to your printer at 100% scale, with the registration marks included on the sheet.
- Load. Put the printed sheet onto the cutting mat (or feed it directly, depending on the machine) in the orientation the software expects.
- Cut. The machine scans for the registration marks, works out the true position of the sheet, and cuts along your line.
- Peel and weed. Remove the cut shapes, or peel away the surrounding waste, and your stickers or decals are done.
Get the middle steps right and the last steps are effortless. Get them wrong and the blade cuts a few millimetres off the print, every time.
It helps to keep the two halves of the process separate in your mind. Everything up to and including printing is about producing a good sheet: sharp artwork, enough bleed, and marks the machine can read. Everything after loading is about the machine reading that sheet accurately. Most people blame the cutter when a job goes wrong, but the fault usually lives in the file - a cut line drawn in the wrong place, marks that scanned poorly, or a page printed at the wrong scale. Because of that, the time you invest in preparing the file is repaid every single time you press cut, which is why automating file preparation removes the biggest source of wasted material.
What a cut file contains
A print-then-cut file is not just a picture. It bundles three distinct things into one document, and understanding each one makes every later problem easier to diagnose.
- The artwork. This is the visible design - usually a raster image (PNG or JPG) or vector art. It is what gets printed with ink. On its own it carries no instruction about where to cut.
- The vector cut line. This is a path, not a picture. It tells the machine where to run the blade. In most cutting software the cut line is identified by a named cut layer or a specific spot colour (for example a colour named "CutContour" or "Through-cut"), so the machine knows to cut it rather than print it. Getting a clean, closed vector path here is essential - a rough or open path produces a ragged cut. See how to turn a PNG into an SVG cut file and how to add a cut line to a sticker.
- Registration marks. These are printed reference targets - crosses, squares or an L-shape - positioned around the artwork. The machine's optical sensor finds them and uses them to align the cut to the print.
When you export a print-then-cut file, all three elements travel together in one document so the machine can print the art and marks, then cut the path.
Registration marks explained
Registration marks solve one problem: the sheet is never in exactly the same place when you cut as it was when you designed. Loading the paper onto a mat, feeding it through rollers, or simply nudging it by hand introduces tiny shifts and rotations. If the machine cut using only the on-screen coordinates, those shifts would show up as a cut line that drifts off the print.
Instead, the machine prints known targets on the sheet, then uses an optical sensor to find them before cutting. From the position of the marks it calculates the real location, rotation and sometimes the scaling of the sheet, and adjusts every cut to match. That is why a design cut with good registration marks lands on the line even if you loaded the sheet slightly crooked.
The catch is that every machine expects its own mark style, size and spacing, and each needs a clear high-contrast zone around each mark so the sensor can read it. Placing marks that your specific machine recognises is fiddly to do by hand. Each machine guide below covers the exact requirements: Silhouette registration marks, Cricut print-then-cut, Roland cut contour and Graphtec registration marks.
There are a few universal rules that hold across all of them. Marks must be printed solid black on a light background, because the sensor works by detecting contrast. They need an empty margin around them - a zone where no artwork, colour or cut line intrudes - so the sensor sees a clean target rather than a mark blended into your design. And they must print at the same scale as the cut data, which is why "fit to page" printing is the single most common cause of failed scans: it shrinks or stretches the marks so their spacing no longer matches what the machine is looking for. Keep those three things right - contrast, clearance and scale - and most registration problems never appear.
Offset and bleed
Two small measurements decide whether your finished stickers look crisp or amateur: offset and bleed. They sound similar but do opposite jobs.
Offset is how far the cut line sits outside the edge of the artwork. If the cut hugged the artwork exactly, any tiny misalignment would leave a sliver of white backing showing on one side. Pushing the cut line out a couple of millimetres gives a clean border and hides small registration errors. A larger offset produces the classic white-bordered "kiss cut" sticker look; a very tight offset gives a contour that follows the art closely.
Bleed works from the other direction. Because the cut can land fractionally inside the print, you extend the printed colour slightly past where the cut line will fall. That way, even if the blade cuts a hair inside the edge, there is still ink underneath and no white gap appears. Bleed is the printed colour running past the cut; offset is the cut running past the art.
Together they give you tolerance in both directions. As a rough starting point, many sticker makers use an offset of around two to three millimetres and a similar amount of bleed, but the right numbers depend on your machine's accuracy, your material and the look you want. A cutter that registers tightly can get away with a smaller offset; a hand-fed machine or a slippery material benefits from more. The full mechanics, and the right values to use, are in the sticker bleed and offset guide.
Kiss cut vs die cut
The same file can produce two very different results depending on how deep the blade goes. A kiss cut cuts through the vinyl or sticker layer but leaves the paper backing intact, so the sticker stays on its sheet and peels off individually - ideal for sticker sheets and easy handling. A die cut cuts through the backing too, giving you a single sticker shaped exactly like the design, with no surrounding sheet.
Which you choose changes how you set blade depth and, often, how you draw the cut line. For a full comparison of when to use each and how to set them up, see kiss cut vs die cut. If you are producing die-cut stickers to sell, the guide to making die-cut stickers to sell walks through the whole production side.
Turning raster art into a cut line
Most artwork starts as a raster image - a PNG or JPG made of pixels. A cutting machine cannot cut a pixel; it needs a vector path. So the core technical task of any print-then-cut job is converting the shape of your raster art into a clean vector outline.
Done well, this means tracing the outer edge of the subject, smoothing jagged pixel steps into a smooth path, closing the path so it forms a continuous loop, and applying the offset discussed above. If your art has a busy background you first need to isolate the subject - see how to remove a background for a die cut. The step-by-step conversion itself is covered in PNG to SVG cut file and add a cut line to a sticker. This tracing-and-offsetting stage is exactly what CutPath Pro automates from a single upload.
The quality of the source image matters here. A PNG with a genuine transparent background gives the cleanest trace, because the edge of the subject is already defined by where the transparency ends. A JPG on a solid background works too, but the tracer has to decide where the subject stops and the background begins, so a busy or low-contrast background makes that harder. Higher-resolution images trace more smoothly than small, blurry ones, because there is more edge detail to follow. If you are drawing the line by hand, resist the temptation to trace every pixel-level wobble; a slightly simplified path cuts more cleanly and is far less likely to snag the blade than one crammed with hundreds of tiny nodes.
File formats overview
Once your file has artwork, a cut line and marks, you need to export it in a format your cutting software will accept. The main options are SVG, PDF, DXF and EPS, and the right choice depends on your machine and workflow. SVG is widely supported and keeps vector cut paths cleanly; PDF is convenient for print-and-cut workflows that carry both the art and the contour; DXF is common in sign-making and CAD-oriented cutters; EPS suits older professional print pipelines. Each has trade-offs around how it stores the cut layer and spot colours.
The most common mistake at this stage is flattening the file. If you export in a way that merges the cut line into the artwork, or rasterises everything into a single image, the machine has no vector path to follow and will refuse to cut or will try to cut the printed edges of the image instead. The format has to preserve the cut line as a separate vector object, ideally still tagged with its cut-layer name or spot colour. That is why hobbyist cutters and professional machines often favour different formats: a Cricut or Silhouette workflow is happy with SVG or the software's own project format, while a Roland pipeline leans on PDF or EPS carrying a named CutContour spot colour. The full breakdown of which format to pick for which machine is in the best file format for cutting, and if the term "cut contour" is new to you, start with what is a cut contour.
Machine-by-machine pointers
Every cutter handles print-then-cut a little differently - different mark styles, different software, different ways of naming the cut layer. Here is where to go for each family.
- Silhouette (Cameo, Portrait). Uses Silhouette Studio with Type 1 or Type 2 registration marks and an optical sensor. Full setup in how to add registration marks in Silhouette Studio.
- Cricut (Maker, Explore). Uses Design Space, which places its own registration marks automatically but is fussy about print scaling and sheet size. Why it drifts and how to fix it is in Cricut print-then-cut.
- Roland. Professional print-and-cut machines that read a dedicated spot colour named CutContour. Details in Roland cut contour.
- Graphtec. Vinyl cutters with their own registration mark system and Cutting Master or Studio software. Covered in Graphtec registration marks.
Generic and other cutters usually follow one of these patterns, so the closest match above is a good starting point.
Common problems and fixes
Almost every print-then-cut failure traces back to a handful of causes. The good news is that they are consistent: once you recognise a symptom, the fix is usually the same every time. If your cut is off, work through these in order, changing one thing at a time so you can tell what actually solved it.
- Cut line offset from the print. Usually the sheet was printed at "fit to page" instead of 100% scale, which resizes the marks and misleads the sensor. Always print at 100%.
- Machine cannot find the marks. The marks may be too light, printed on glossy or coloured stock, or lit by glare. Print marks solid and black, and keep the artwork clear of each mark's exclusion zone.
- Ragged or broken cut. The cut path is open, jagged or made of many tiny segments. You need a smooth, closed vector path - see PNG to SVG cut file.
- White edge showing on finished stickers. Not enough bleed. Extend the printed colour past the cut line - see bleed and offset.
- Cut too deep or too shallow. Blade depth or pressure is wrong for a kiss cut versus a die cut - see kiss cut vs die cut.
- Machine will not read the cut layer. The cut line is not on the named cut layer or spot colour the software expects, or the export format dropped it - check the best file format for cutting.
One habit prevents most of these problems: do a small test cut before committing an expensive sheet. Print a single design with its marks, run it through the machine, and check that the cut lands on the line and at the right depth. If it does, scale up with confidence. If it does not, you have wasted one sticker rather than a full sheet, and the list above will point you straight at the cause. Keeping a note of the settings that worked for each material saves repeating the diagnosis next time.
The fast way with CutPath Pro
Doing all of this by hand - isolating the subject, tracing a clean vector outline, applying an offset, placing the correct registration marks for your machine, and exporting in the right format - is the slow, error-prone part of print-then-cut. CutPath Pro collapses it into one upload. Drop in a PNG or JPG, and it traces a smooth cut line that hugs the art, applies a sensible offset, adds machine-ready registration marks for Silhouette, Cricut, Roland, Graphtec or a generic cutter, and lets you export as SVG, PDF, DXF or EPS. You load the result straight into your cutting software and go. Your first cut file is free.
Build a print-then-cut file in seconds
CutPath Pro traces a clean cut line, adds machine-ready registration marks and exports SVG, PDF, DXF or EPS. Your first cut file is free - no card needed.