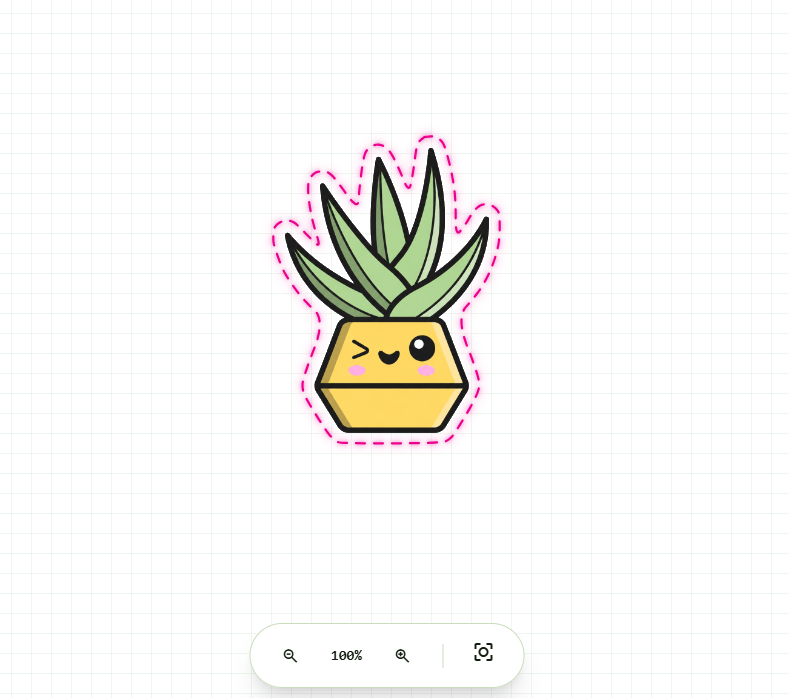
How to Add a Cut Line to a Sticker (Without the Pen Tool)
A cut line is the single path your machine follows to trim a sticker out of the sheet. Getting one that hugs your artwork is fiddly by hand - here is how it is normally done, and how to skip the tracing entirely.
What a cut line actually is
A cut line is one closed vector path. It is not the artwork and it is not a printed outline - it is the route the blade takes around your design. For a die-cut sticker the path is usually offset a few millimetres outside the artwork, so that any small misalignment when the machine cuts trims into blank space rather than clipping the design. You can also inset the path, cutting slightly inside the edge, but for stickers an outward offset is almost always what you want.
The important word is closed. The path has to join back to itself with no gaps, or the machine will not know where the sticker begins and ends. It also has to be a true vector shape, not a raster image, because a cutter follows coordinates, not pixels.
The manual methods (and why they hurt)
There are three common ways to draw a cut line by hand, and all of them share the same catch: they need a vector shape to start from.
Tracing with the pen tool
The most direct approach is to grab the pen tool in Illustrator, Affinity or Inkscape and trace around the sticker by placing anchor points one at a time. It works, but it is slow and the result is only as steady as your hand. Curves come out lumpy, spacing from the edge drifts, and a single sticker with a detailed outline can take many minutes to trace. Do a sheet of them and you lose an afternoon.
Illustrator: Object > Path > Offset Path
If you already have a vector shape, Illustrator can build the offset for you. Select the shape, choose Object > Path > Offset Path, and enter a positive value to push the line outwards. This is far more even than tracing by hand, and you can set the join style so corners are rounded rather than spiked.
Inkscape: Dynamic Offset or Linked Offset
Inkscape offers Dynamic Offset and Linked Offset, both under the Path menu. Dynamic Offset gives you a handle you can drag to grow or shrink the outline live; Linked Offset keeps the new path tied to the original so edits flow through. Again, clean results - but only once you have a vector to offset.
The catch with raster artwork
Here is where most sticker makers get stuck. Offset Path and Dynamic Offset both need a vector shape as their input. If your artwork is a PNG or JPG - which almost all downloaded, painted or AI-generated art is - none of these tools can touch it directly. You first have to trace the raster into a vector (Image Trace in Illustrator, Trace Bitmap in Inkscape), clean up the stray nodes and holes that tracing leaves behind, then offset the result. That trace-and-clean step is where the real time goes, and it is easy to end up with a jagged outline that follows every pixel of a rough edge.
Choosing an offset and rounding the corners
Two settings decide whether a cut line looks professional:
- Offset distance. For die-cut stickers, 2 to 3 mm outwards is the usual choice. It leaves a slim border of backing around the art, hides small cutting misalignment, and keeps the sticker easy to peel. Go tighter and any drift clips the design; go wider and the border starts to look clumsy.
- Corner rounding. Sharp offset corners create fragile points that lift and catch. Rounding the outline - a soft radius on the joins - gives a smoother, more durable edge and the classic die-cut look. In offset tools this is the join or corner style; set it to round rather than mitre.
The fast way: let CutPath Pro trace and offset in one step
CutPath Pro collapses the whole trace-then-offset routine into a single upload. Drop in your PNG or JPG and it traces a clean outline of the artwork and offsets it in one pass, so you never touch the pen tool or the Image Trace panel. You set the offset value - say 3 mm out - and pick a corner style, and it draws a smooth, closed cut path that hugs the design. When it looks right you export the cut file as SVG, PDF, DXF or EPS and load it straight into Silhouette Studio, Cricut Design Space, Roland, Graphtec or any generic cutter.
Let the cut line draw itself
Upload a PNG or JPG and CutPath Pro traces, offsets and rounds a clean cut line for you. Your first cut file is free - no card needed.